Train Your Voice Model
Once you've prepared your high-quality audio segments, you're ready to train your custom voice model.
What you'll get from this step:
t2s.pt- Text-to-speech model filevits.pt- Voice synthesis model file
What You'll Need
We'll use Google Colab for training since it's free and provides the GPU power you need.
Make sure you have:
- A Google Drive account
- A Google Colab account
Step 1: Set Up Model Files
First, you'll need access to the pre-trained model files.
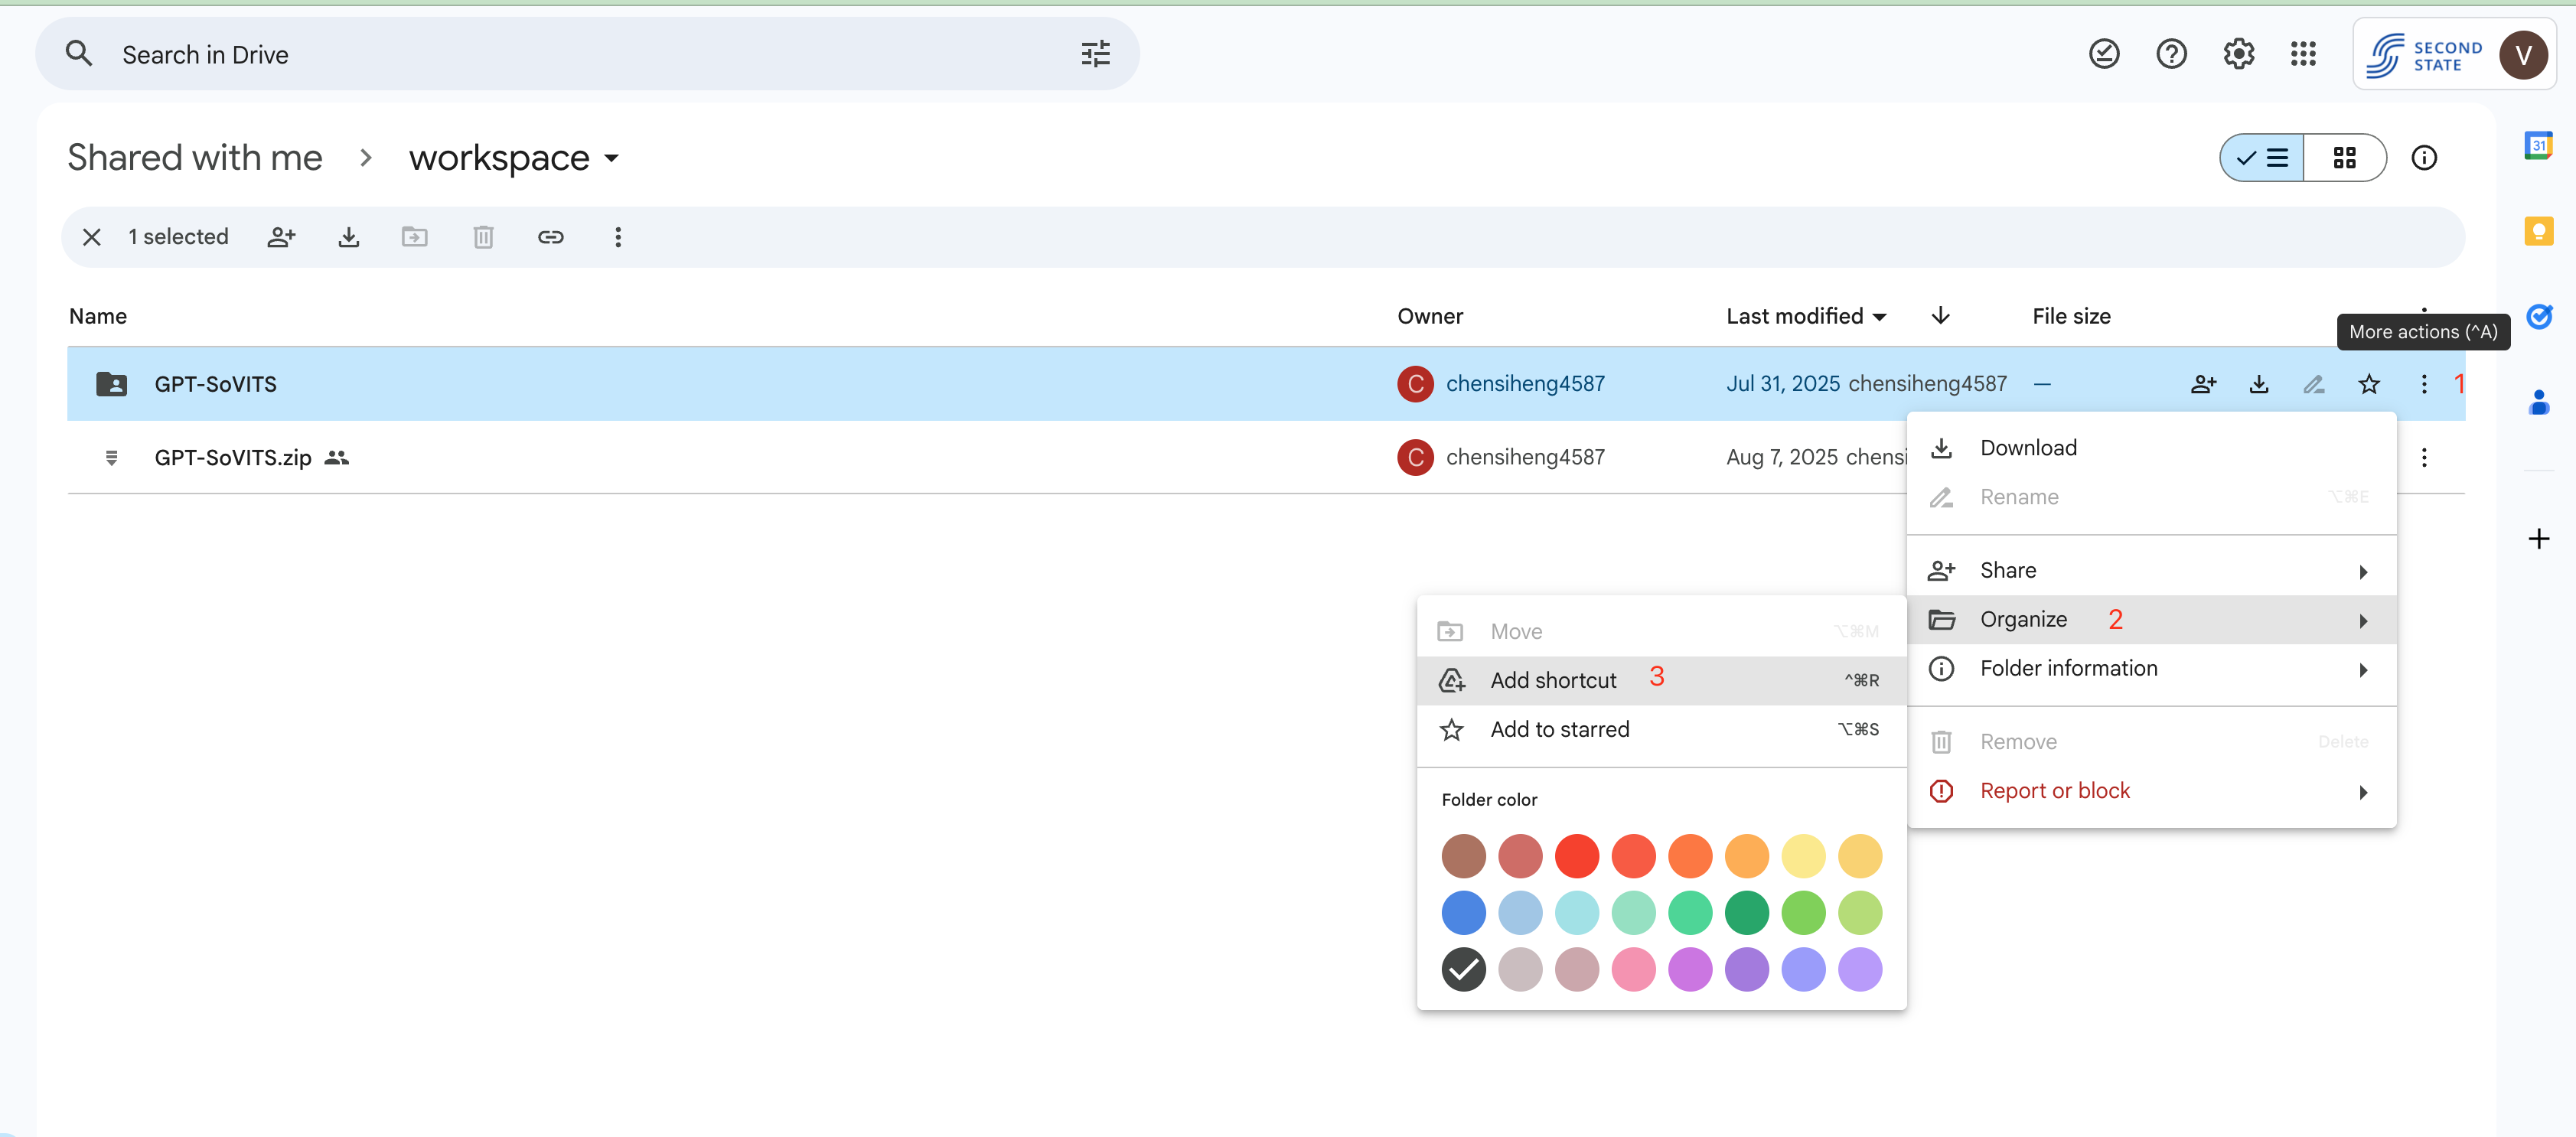
- Add model files to your Drive: Visit the GPT-SoVITS Google Drive Folder
- Create a shortcut: Click "Add shortcut to Drive" to add these files to your workspace (see image below)
Step 2: Open the Training Notebook
- Open the template: Go to the Training Notebook
- Make your own copy: Go to File → Save a copy in Drive
- Connect your Drive: Click the Drive folder icon to mount Google Drive
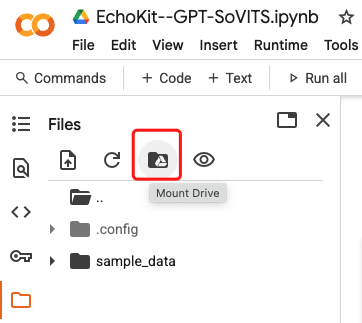
- Grant permissions: Allow Colab to access your Drive files
Click the folder icon on the left sidebar to browse your Drive contents.
Step 3: Upload Your Audio Data
Now you'll upload the audio segments you prepared in the last article.
- Create a list file: Make a
.listfile containing your transcriptions from the website (It may have done by the Segment Audio Files with EchoKit's Audio Processor) - Organize your files: Put the
.listfile in the same folder as your audio files (It may have done by the Segment Audio Files with EchoKit's Audio Processor) - Compress the folder: Create a zip file of your entire audio folder (It may have done by the Segment Audio Files with EchoKit's Audio Processor)
- Upload to Colab: Use the upload icon in Colab's file browser to upload your zip folder.
- Extract the files: Run
unzip your-folder.zipin the terminal.
Step 4: Copy Model Files to Your Workspace
The shortcut you created points to the model files, but you need actual copies in your workspace.
- Open terminal: Click the terminal icon (bottom-left in Colab)
- Run these commands:
cd drive/MyDrive
mkdir -p workspace/GPT-SoVITS/
cp -r GPT-SoVITS/ workspace/GPT-SoVITS/
Note: This will take a few minutes since the files are several GB in size.
Step 5: Install Dependencies
Run each cell in your notebook in order, ending with:
!pip install -r requirements.txt
Important: When this finishes, you'll be asked to restart the runtime. Click "Restart".
Step 6: Prepare Your Training Data
After restarting, run the cells starting from:
%cd /content/drive/MyDrive/workspace/GPT-SoVITS
Continue until you reach this code block:
s = process_ad_list('/content/train-model/echokit.list', 'echokit', 'en')
with open('/content/train-model/echokit.new.list', 'w') as f:
    f.write(s)
Before running this command, update these values to match your setup:
- File path:
/content/train-model/echokit.list→ your actual.listfile path - Model name:
echokit→ your preferred model name - Language:
en→ your language code
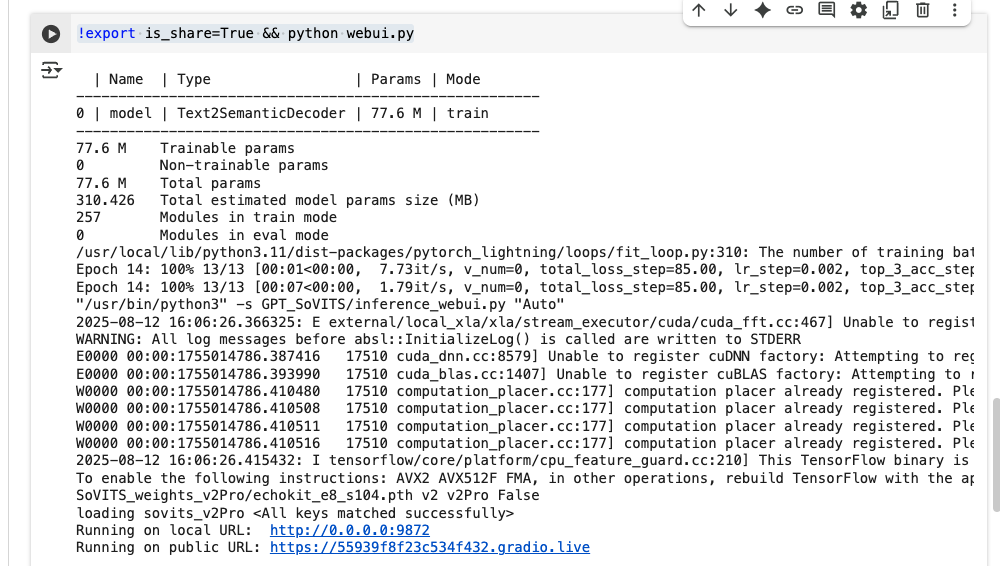
Step 7: Start the Training Interface
Run this command to launch the web interface:
!export is_share=True && python webui.py
You should see output like:
Running on local URL:  http://0.0.0.0:9874
Running on public URL: https://fbefe7d567a1054c43.gradio.live
Open the public URL in your browser and click the 1-GPT-SOVITS-TTS tab.
Step 8: Configure Training Settings
- Enter your model details:
- Model name: Use the same name from Step 6
- List file path: Path to your
.listfile from Step 6
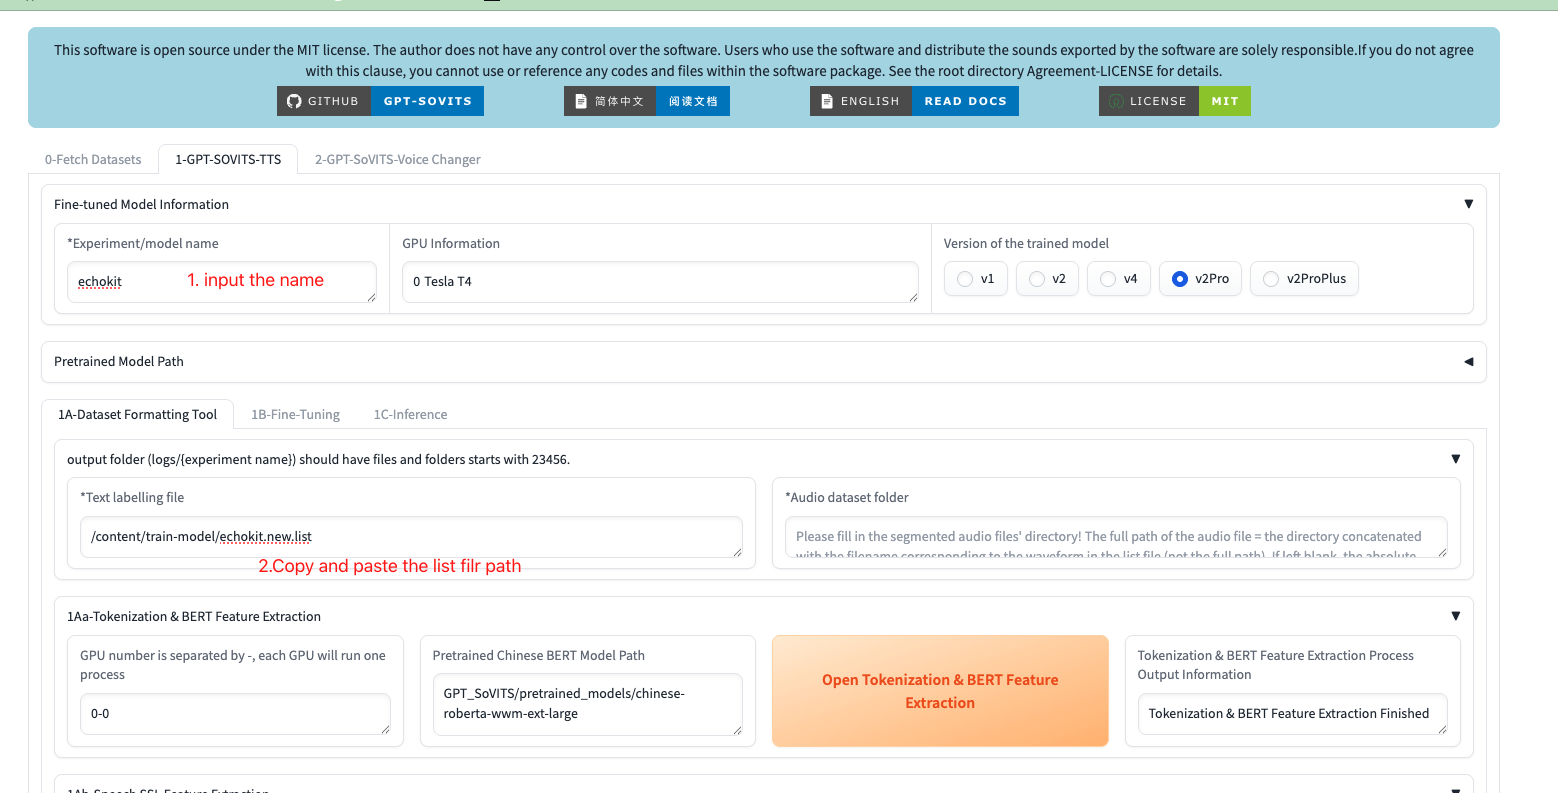
- Run preprocessing steps (click each button and wait for completion):
- "Open Tokenization & BERT Feature Extraction"
- "Open Speech SSL Feature Extraction"
- "Open Semantics Token Extraction"

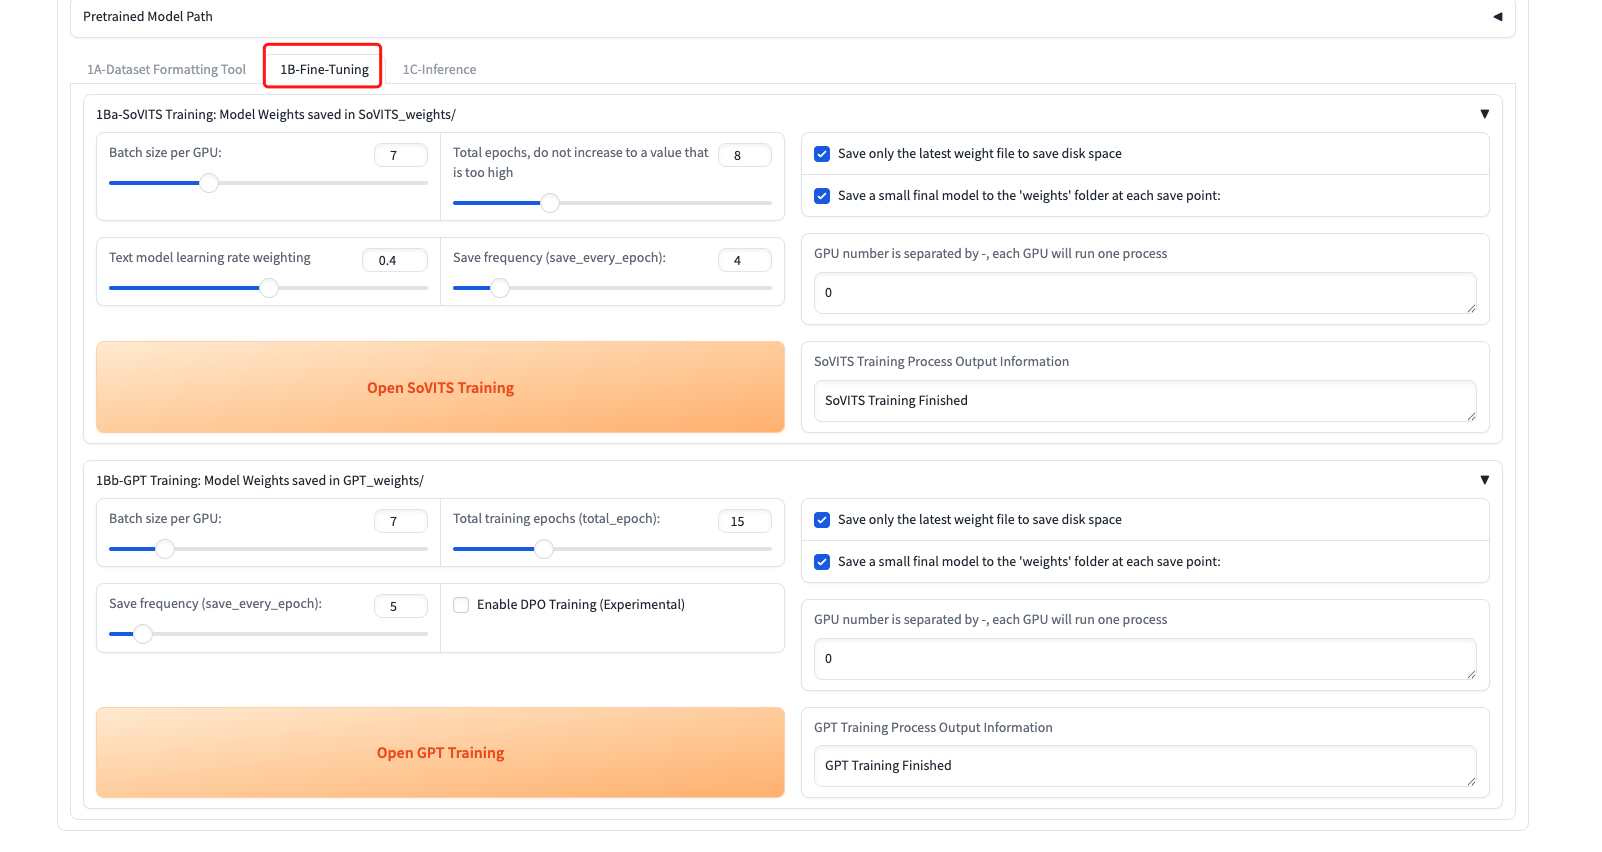
Step 9: Train Your Models
- Go to the 1B-Fine-Tuning tab
- Start training (click each button and wait):
- "Open SoVITS Training"
- "Open GPT Training"
Step 10: Test Your Model
Once the training is done, you can start to test your voice-cloned model.
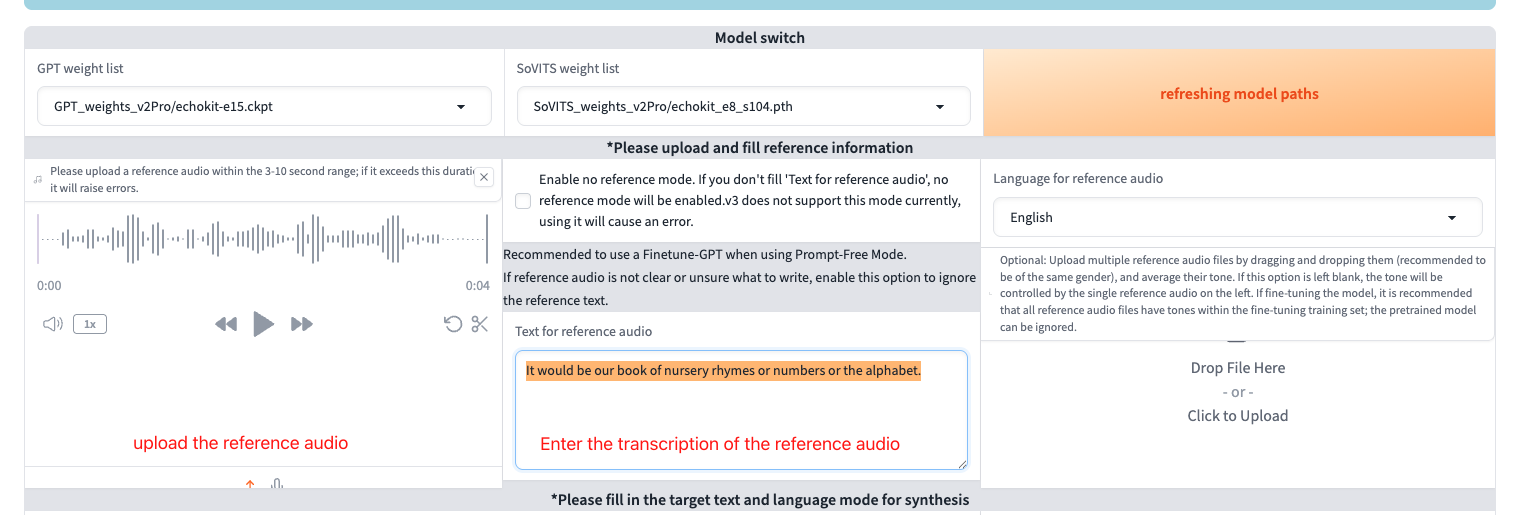
- Go to the 1C-Inference tab
- Select your trained models:
- GPT weight: Choose
GPT_weights_v2Pro/[model-name]-e15.ckpt - SoVITS weight: Choose
SoVITS_weights_v2Pro/[model-name]_e8_s104.pth
- GPT weight: Choose
- Click "Open TTS Inference WebUI"
Check your Colab notebook for the inference URL:
Step 11: Test Voice Generation
Open the inference URL in your browser:
- Upload reference audio: Use one of your training audio files
- Enter reference text: Type the exact transcription of your reference audio
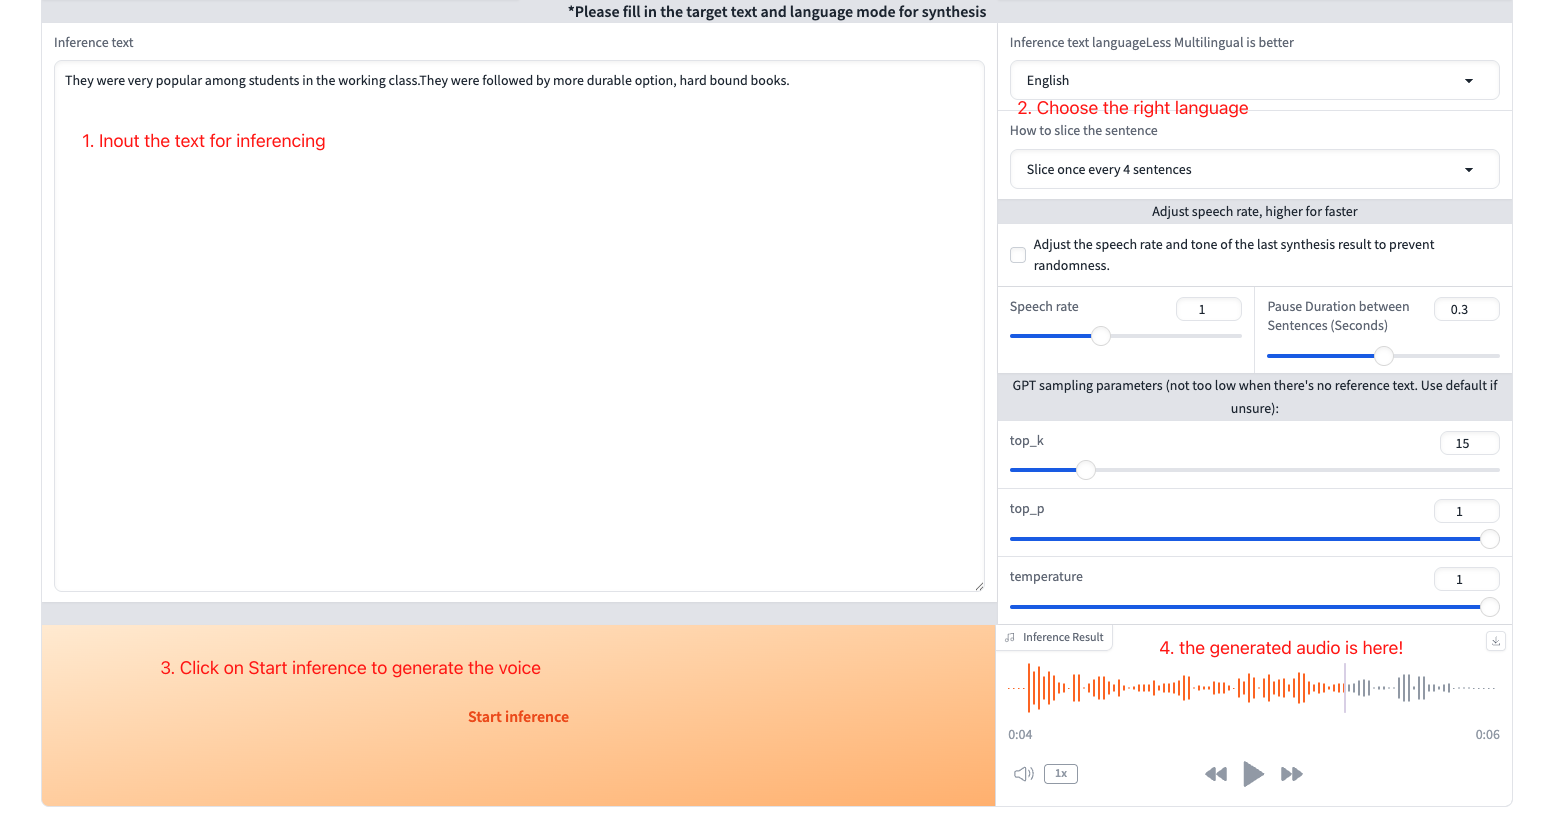
- Test generation:
- Enter text you want to synthesize
- Select the correct language
- Click "Start inference"
If you're not satisfied with the results, review your training audio quality and consider retraining.
Step 12: Export Your Models
Once you're happy with the voice quality:
-
Prepare reference audio: Convert your reference audio to 16kHz:
ffmpeg -i REFERENCE_AUDIO_PATH.wav -ar 16000 -ac 1 output.wav -
Export the models: Run this command (update the paths to match your setup):
!python GPT_SoVITS/stream_v2pro.py \
--gpt_model GPT_weights_v2Pro/echokit-e15.ckpt \
--sovits_model SoVITS_weights_v2Pro/echokit_e8_s104.pth \
--ref_audio /content/output.wav \
--ref_text 'It would be our book of nursery rhymes or numbers or the alphabet.' \
--output_path /content/models \
--version v2Pro \
--device=cuda
Make sure to update:
gpt_model: Path to your GPT modelsovits_model: Path to your SoVITS modelref_audio: Path to your 16kHz reference audioref_text: Exact transcription of your reference audiooutput_path: Where to save the final model files
Final Output
After export completes, you'll have:
out_final.wav- Test audio to verify everything workst2s.pt- Your text-to-speech modelvits.pt- Your voice synthesis model
Listen to out_final.wav to confirm your model is working properly.
Next step: Deploy your models to start using your custom voice with
t2s.ptvits.pt- Reference audio in 16k
- The transcription of the reference audio