Test your EchoKit server
Once you have your EchoKit server running successfully, you can test it using a web-based EchoKit client to verify that voice interactions work properly.
Prerequisites
Before testing, ensure:
- Your EchoKit server is running and accessible
- You know your server's IP address and port
- Your browser supports WebSocket connections
- Your microphone is working and accessible to the browser
Testing Steps
1. Overall instructions
Go to https://echokit.dev/chat/ in your web browser.
2. Download the Test EchoKit Client
- Download the
index.htmlfile to your local computer - Save it in a location you can easily find (e.g., Desktop or Downloads folder)
3. Open the Test Client
- Double-click the downloaded
index.htmlfile - It will open in your default web browser
- Allow microphone access when prompted by your browser
4. Connect to Your Server
- Enter your EchoKit server's WebSocket URL in the connection field
- Format:
ws://[your-server-ip]:[port]/ws/ - Examples:
ws://192.168.1.100:9090/ws/
- Format:
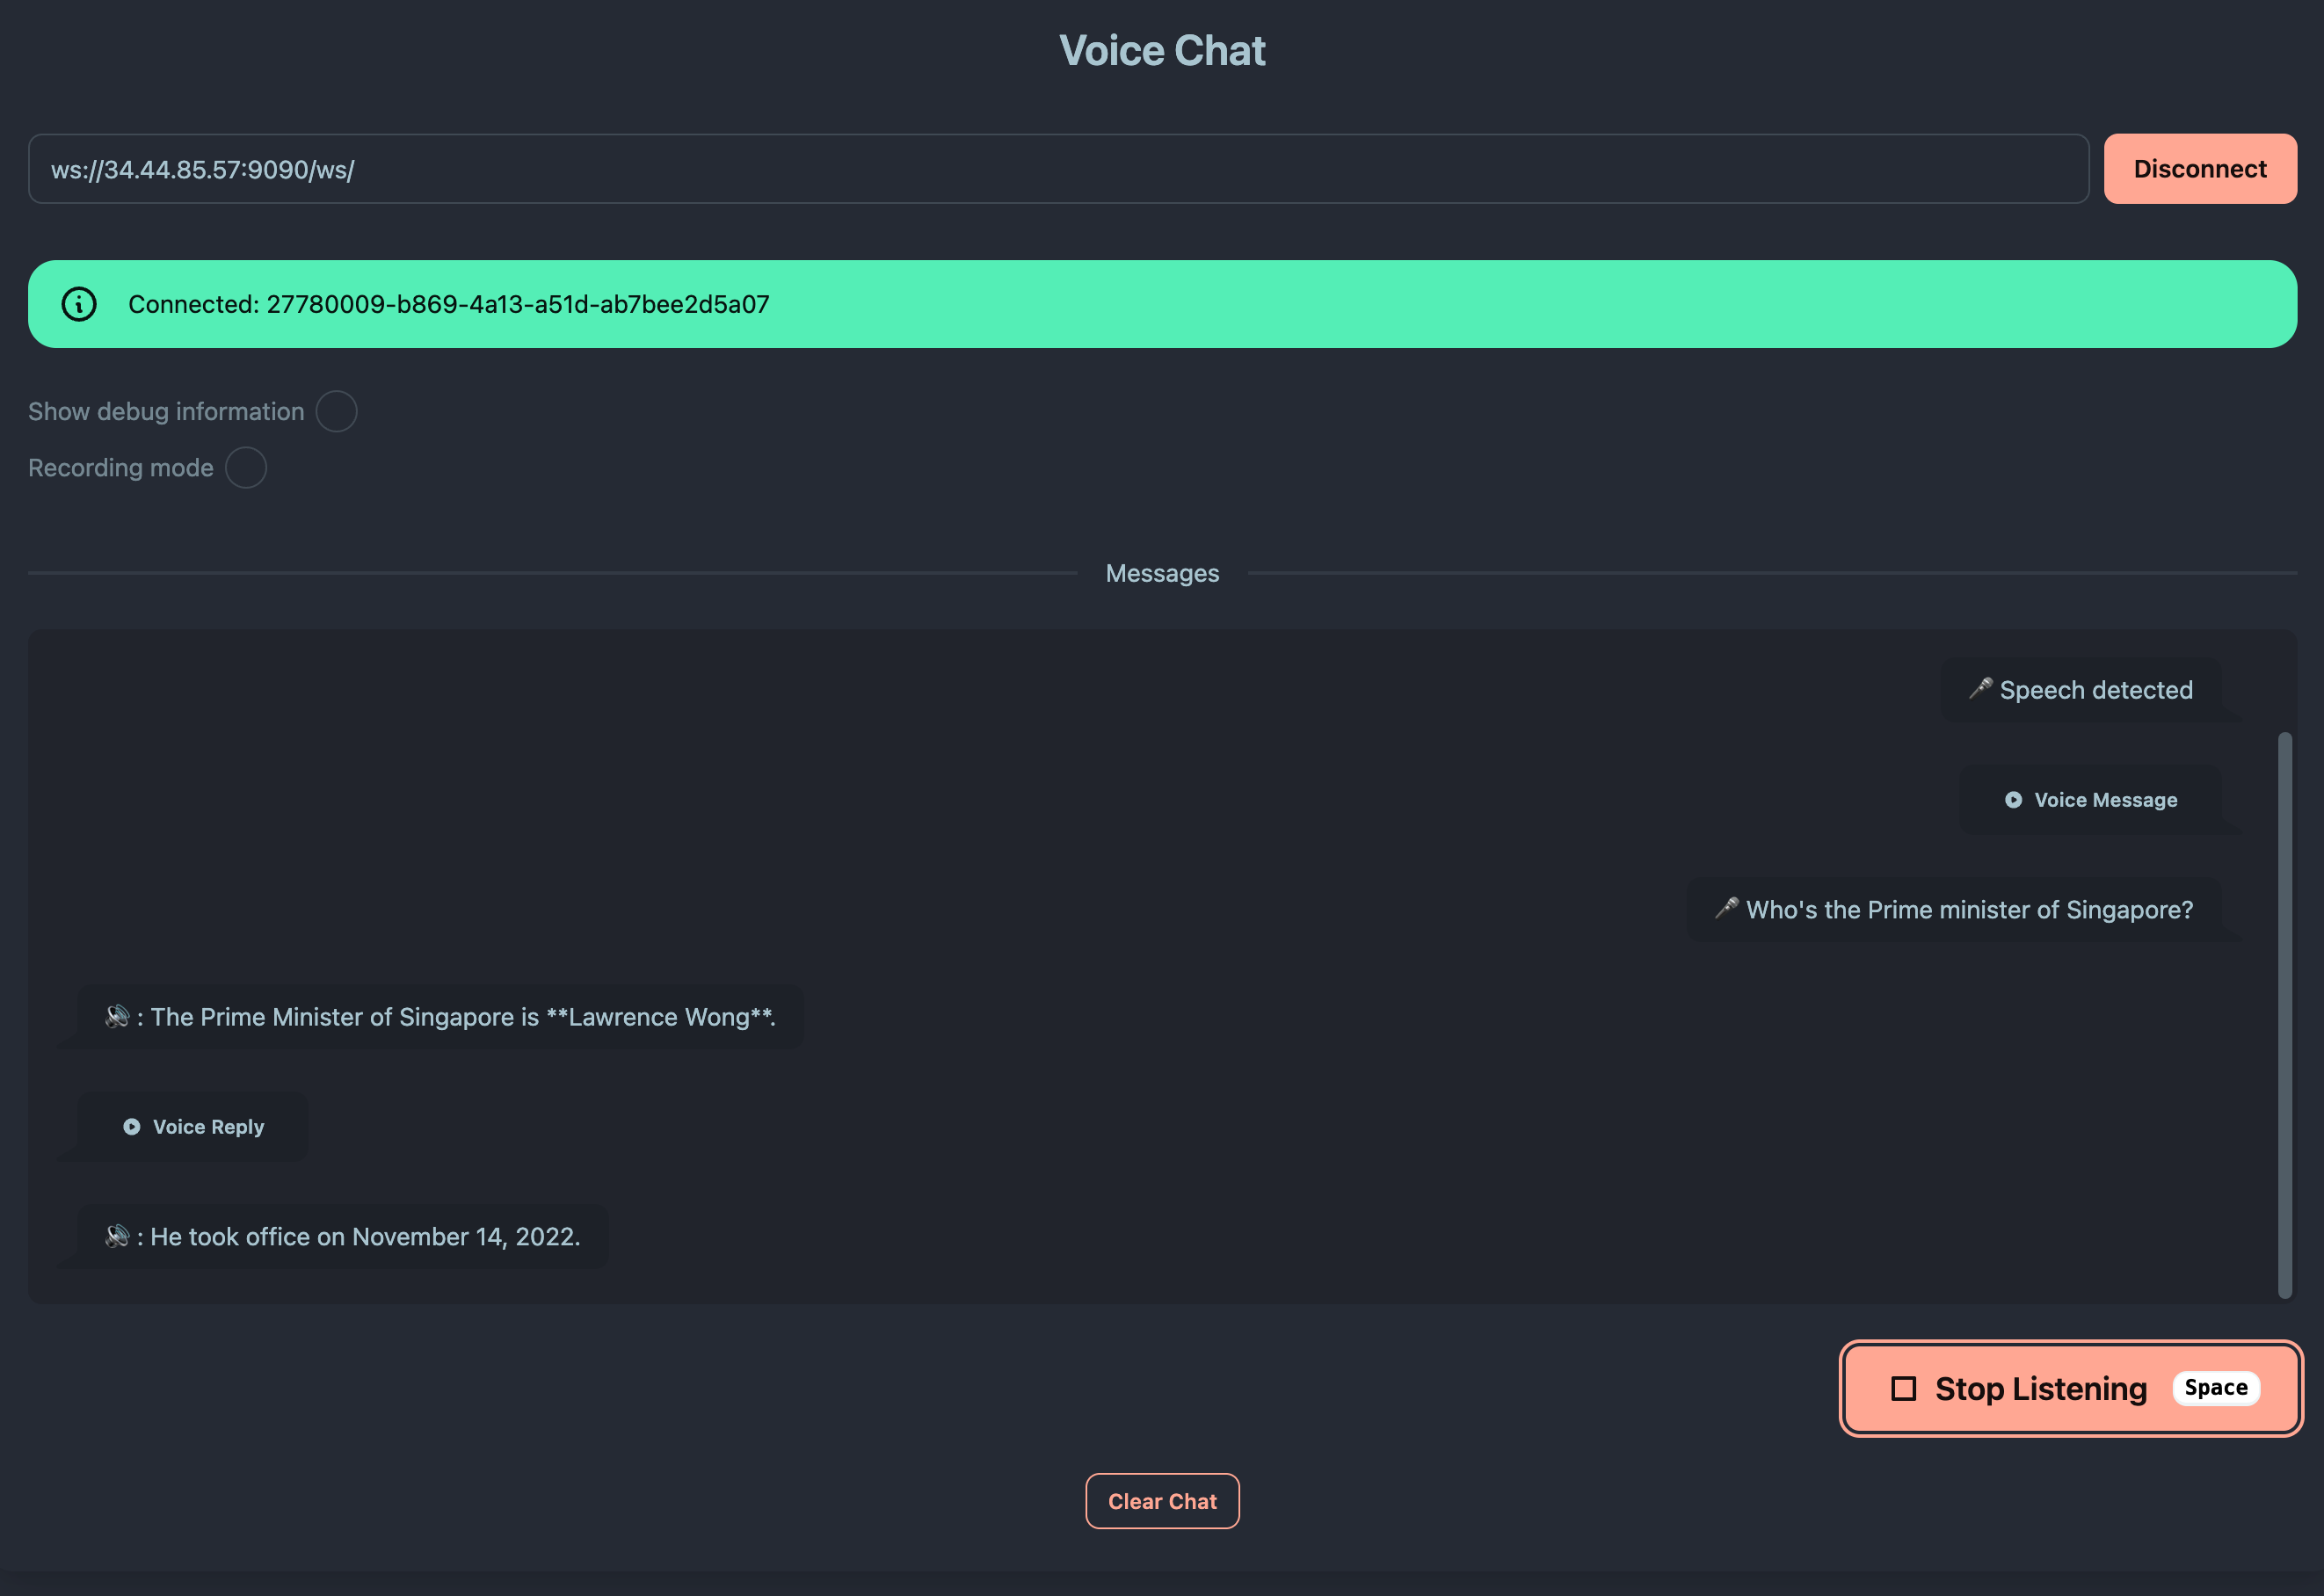
- Click "Connect" to establish the WebSocket connection
- You should see a "Connected" status message
5. Test Voice Interaction
- Click "Start Listening" to begin voice capture
- Start speaking your question or command
- Speak clearly and at normal volume
- Wait for the system to process your speech
- Click "Stop Listening" when you finish speaking
- Wait for the response - EchoKit will process and respond with voice
Expected Behavior
Successful Test Flow:
- Connection established ✅
- Speech captured and sent to server ✅
- Server processes speech → text → LLM → text → speech ✅
- Audio response plays in your browser ✅
✅ Success! Once you can successfully have a voice conversation through the web interface, your EchoKit server is ready for real-world use.